That being said, I will never, ever make another piece of subway art (not this way anyway) as long as I shall live. I know they say never say never - but I'm serious. NEVER.
I wanted to create a mantle piece since this is our first year with our beautiful mantle that my dad built for us as a gift last Christmas. For some odd reason I'm loving a more whimsical feel of decorations this year as opposed to my usually more traditional decor. I'm hoping to happily marry the two. Anyway, Christmas themed subway art was what I decided on for the mantle. It would be cheap, red, whimsical and meaningful. The perfect combo.
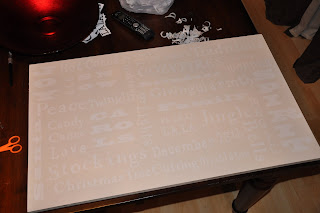
It started with a big piece of plywood we had left over from some other project we had done at some point. I spray painted it heirloom white and let it dry overnight. Then I chose three different fonts and sizes and created the words to print and lay out. I printed 2 sets. The first set I trimmed up neatly to lay out and plan the board.
 The next step was to take the second set and glue them to contact paper. Then the real fun began. I honestly don't know what I was thinking. I saw the instructions and thoroughly read them before attempting this project, but I guess I didn't fully think through what each step would entail. See, the next step is cutting out every letter of every God forsaken word that you will put on this board. And, while it's not hard, it's very, very labor intensive. I think it took close to 7 full hours (with Ritchie's help) of cutting out these damn letters.
 See what an amazing husband I have? That's love. Xacto cutting out all the holes in the "o's" "a's" and "e's" not to mention the "p's" "b's" and "d's". Not to mention the letters that I just got lazy on cutting and left for him to do.
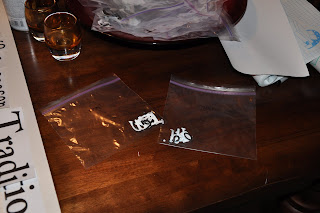
  I put the cut letters in labeled bags. In a perfect world the glue would have held and we would have had the printed black ink showing up for each letter. In our world, however, the glue did not hold up and not only did we have to hold the letter in place while we cut it out, we had to out white contact paper on the white board. Super fun. See my neat little labeled bags? I'm crafty and organized!
 Next I had to peel off the back of the contact paper and stick all of the letters on, replacing the laid out. It was very challenging to get everything lined up straight and as a result there are some definitely crooked words. Ah well, what are you going to do?
 Next I sprayed over the letters with colonial red spray paint and seriously prayed that I had done a good enough job of sticking the contact paper down so as not to have the red seep all over the white. Let that coat of paint dry, pull up the contact paper (MUCH easier than I thought it would be) and voila! Approximately 20 hours later you shall have a lovely piece of subway art.


1 comment:
I love this! It does indeed look very labor intensive, and both of you get major kudos for cutting out all of those letters! I have to be honest, when I saw your pics on FB, I was hoping you'd blog about it, and you did! Yay! I'd love to see a pic of the mantle once you've got it all decked out.
Post a Comment